


"react-native": "*" explicitly for this reason. If you are using an older version of React Native with this module though, some features may be buggy.I am using react-native-maps to render a Google map on my phone. I was struggling through the documentation and received lots of Xcode errors during implementation, so that spurred me to write this tutorial in order to show you my steps that allowed me to eventually get a Google map on my simulator and phone!
Let’s start from the very beginning. I created a new React Native repo. If you haven’t installed the React Native command line tools I would do so now. npm i -g react-native-cli
Next I created my project by the following command:react-native init MapExample
(At the time of my build my react-native-maps was v0.15.3, react-native was v0.46.4 and React was v16.0.0-alpha.12)
On a side note, you can also create projects by the commandcreate-react-native-app, but since we need to be linking I am using the older command line tools instead of having to deal with ejecting and plus I’ll have full control over my compiling.
First I’m going to cover iOS development. Now you will want to cd into your project and run the commandreact-native run-ios, which should open your iOS simulator. If you’re having trouble with running your simulator you might need to install some other packages. Here are the React Native docs to help with that.
We’re just going to be putting the map on the home screen of the project, so all the code will be in the index.ios.js file. Now onward to mapping!
As a reference I’m following these docs, but I’ll walk you through all of my steps and include images that will hopefully help with the whole process of implementing a map into your project.
npm install react-native-maps --save
If you want to use the same version as I did in this repo you cannpm install react-native-maps @0.15.3 --save


I immediately got this horrible red screen yelling at me! Whenever I see that question mark in the white diamond in an error message I know that I need to restart the simulator. After you shut down the simulator and rerunreact-native run-ios that red screen should be gone.
Now you will want to link your native dependencies with Xcode.
react-native link react-native-maps


Now we need to create our Podfile for our CocoaPods within the iOS foldertouch ios/Podfile and you will also need to gem install cocoapods (you might need to sudo install). Below is the code that should go into your Podfile. Replace ‘MapExample’ with the name of your project.
platform :ios, '8.0'target 'MapExample' dopod 'Yoga', :path => '../node_modules/react-native/ReactCommon/yoga/Yoga.podspec'pod 'GoogleMaps'end
You don’t need to install a React pod since you already have the React library, Including the React pod could cause conflicts within your Xcode set-up.
Next you will need to install the Pods.
cd ios and run pod install and then get back out of that folder cd ..

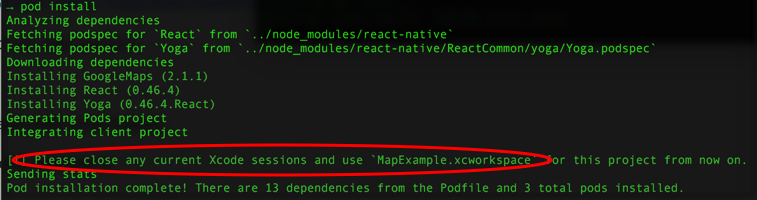
Now you will no longer be using your .xcodeproj file, and will now be using your workspace .xcworkspace file since you have installed CocoaPods.

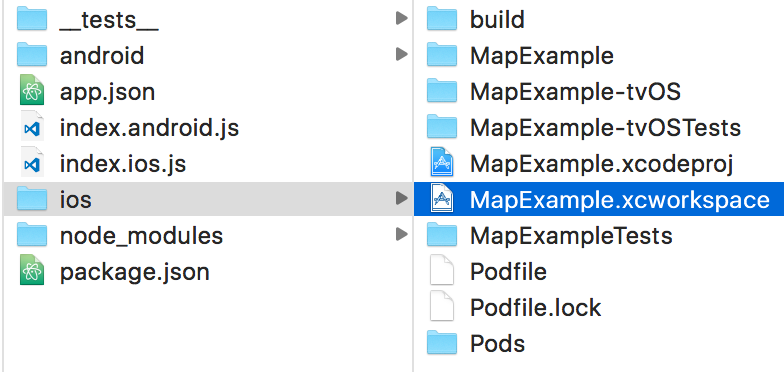
Open your .xcworkspace file because now we need to add AirGoogleMaps to the project. Within your Finder go into your node_modules in your project and navigate to the AirGoogleMaps folder.


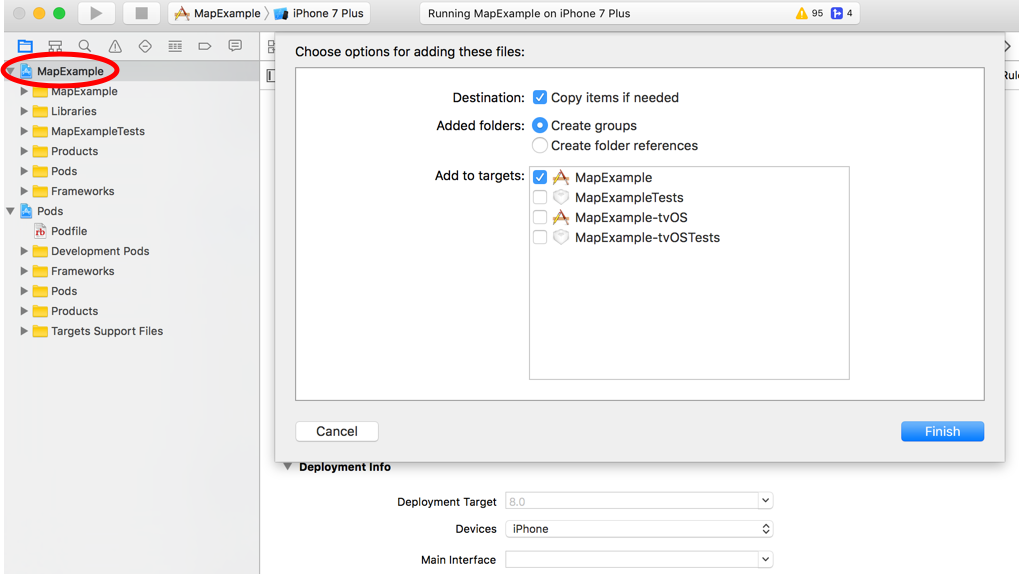
Drag the AirGoogleMaps folder into your project. After dropping that folder into your project there will be a pop-up window in which you will specify to Create groups.

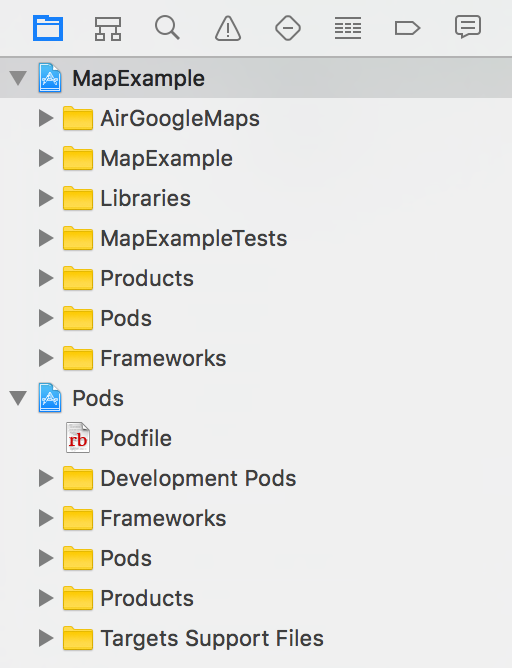
Your project file structure should now look like this:

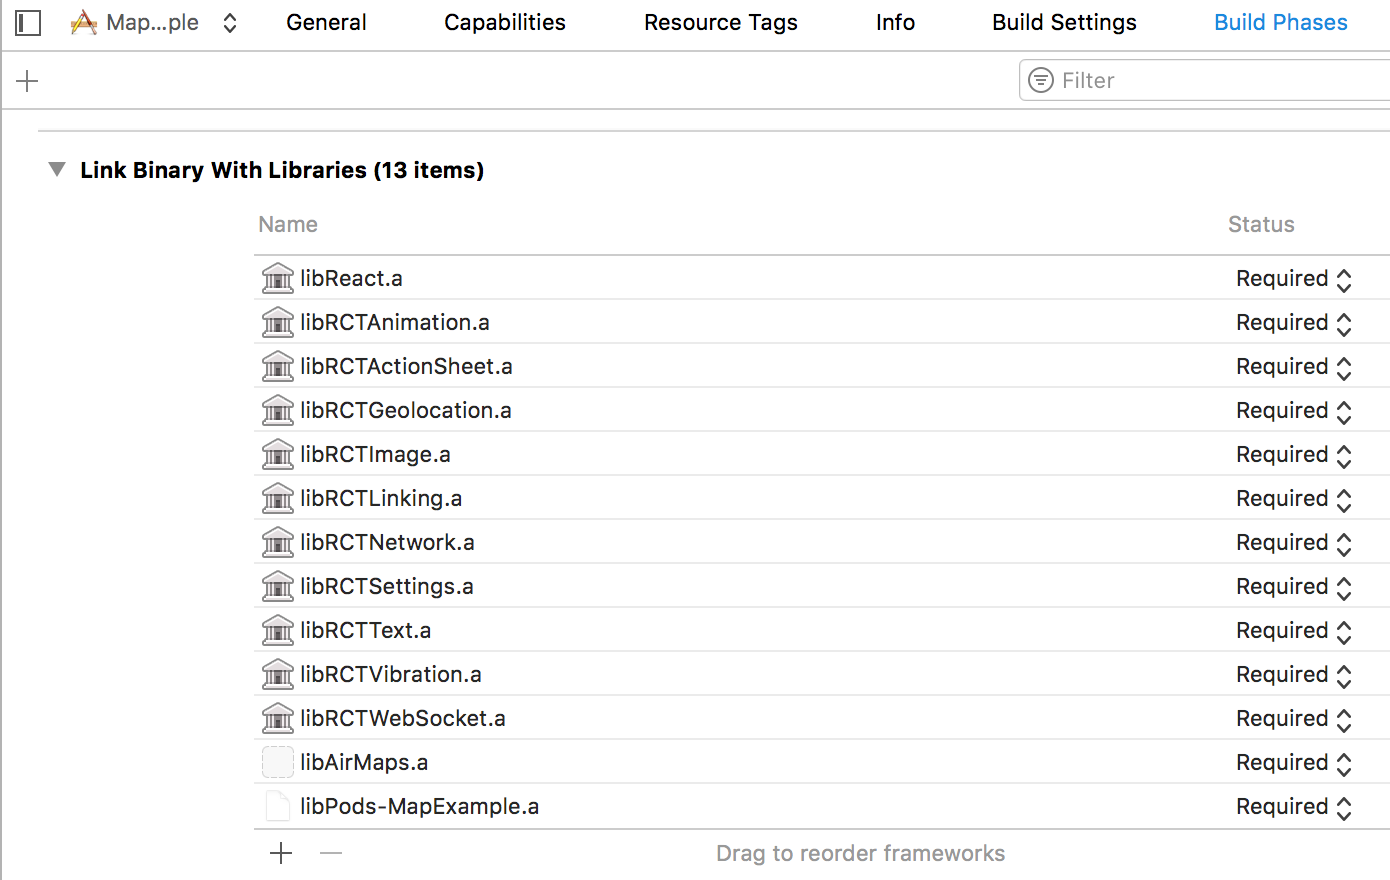
And your libraries in your Build Phases should look like this:

Now navigate to your Build Settings to the Search Paths section. Double click on the file path in the Header Search Paths. Another pop-up window will appear and you will want to click on the plus sign to add this line to it:
$(SRCROOT)/../node_modules/react-native-maps/lib/ios/AirMaps
And then don’t forget to change the non-recursive setting to recursive.


In order to use Google maps you will need to create a Google Maps API key.

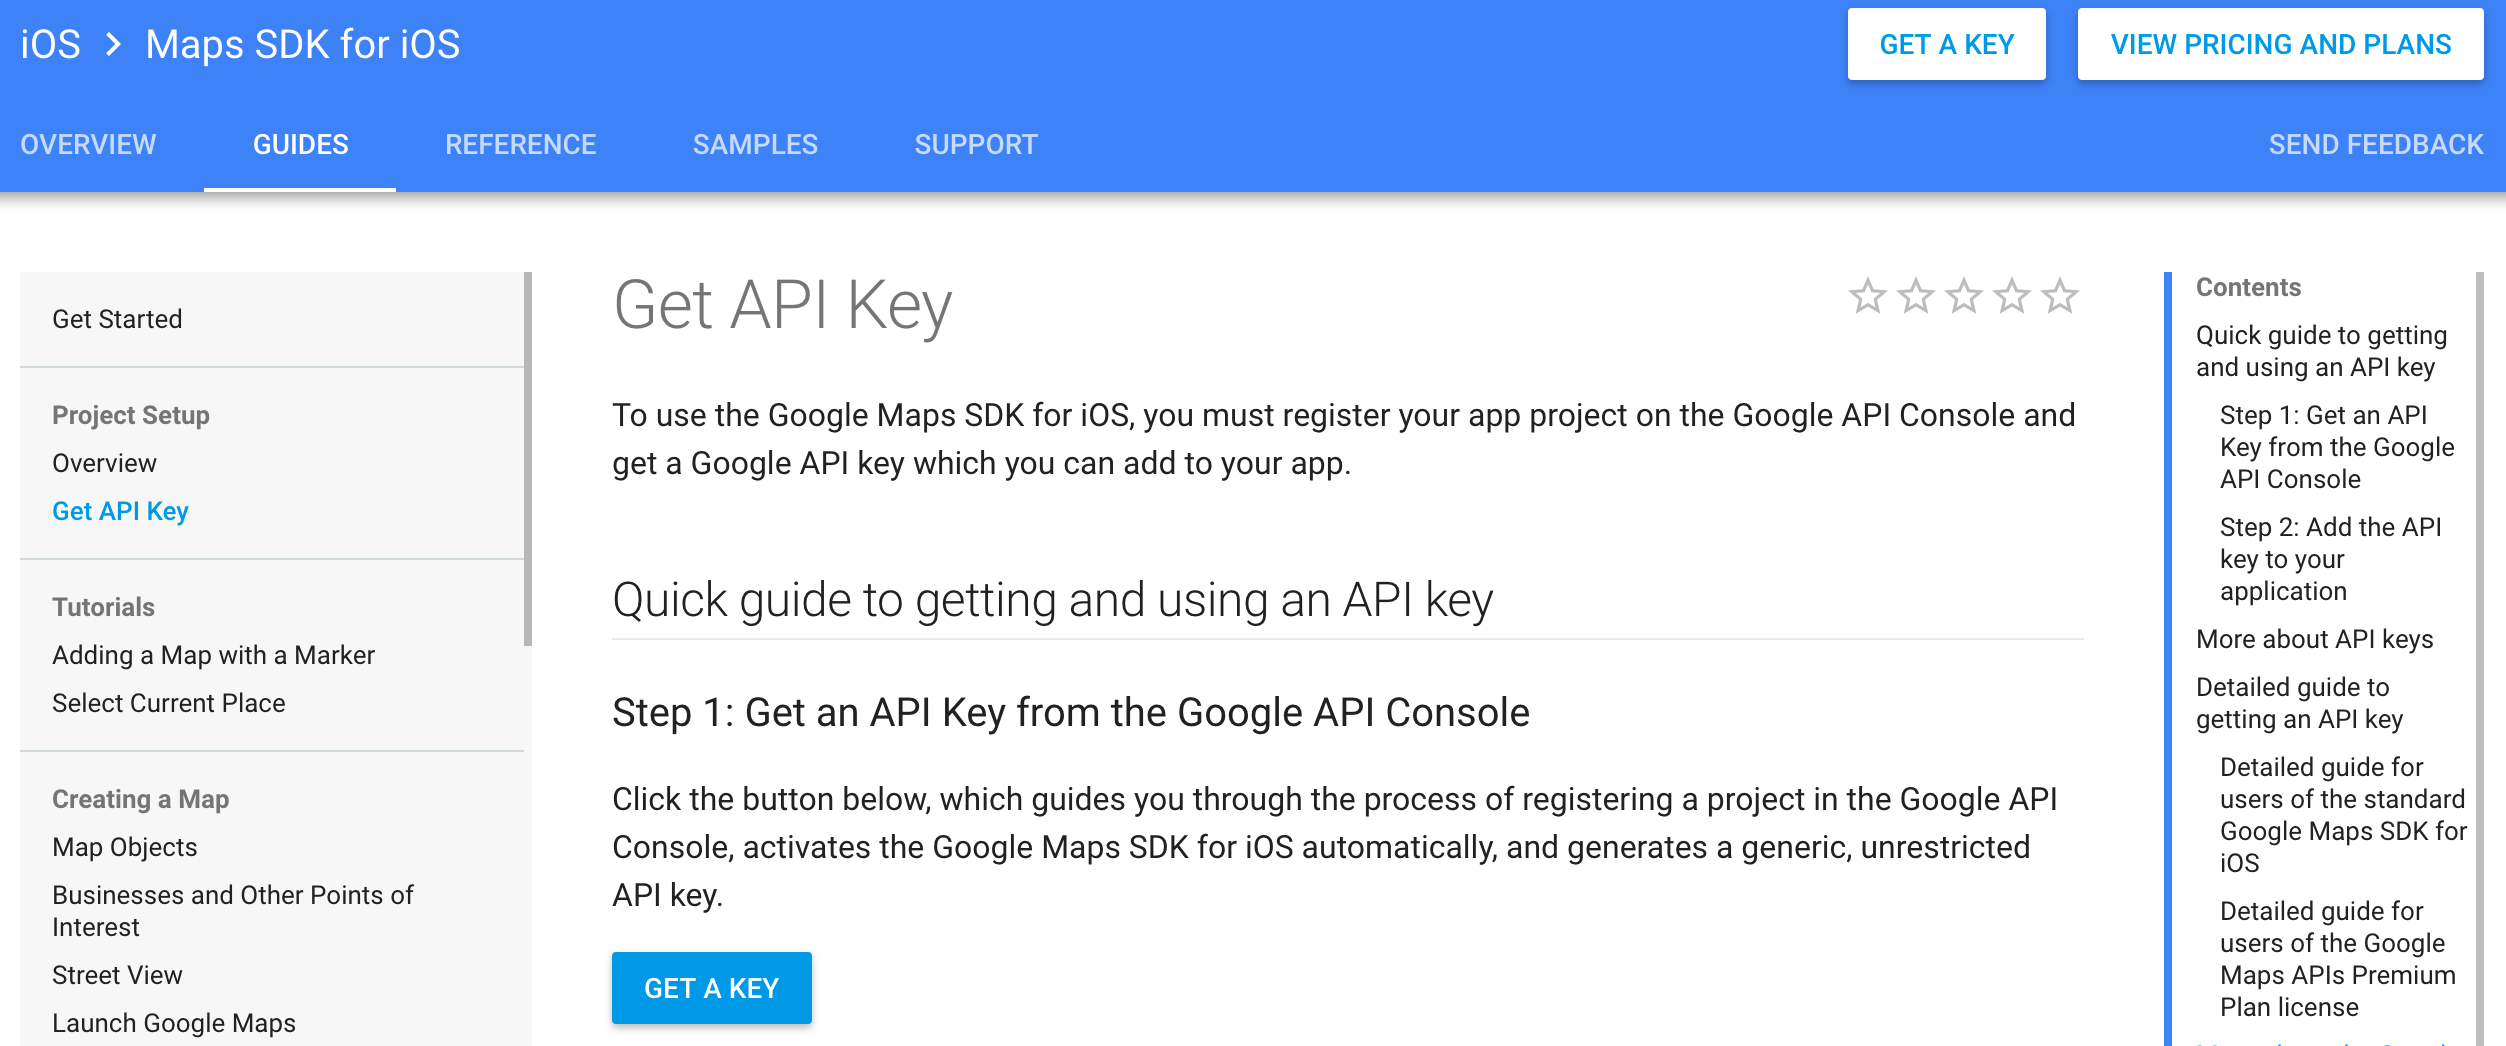
Click the ‘Get a Key’ button and you can either create a new project or select one of your projects already built.


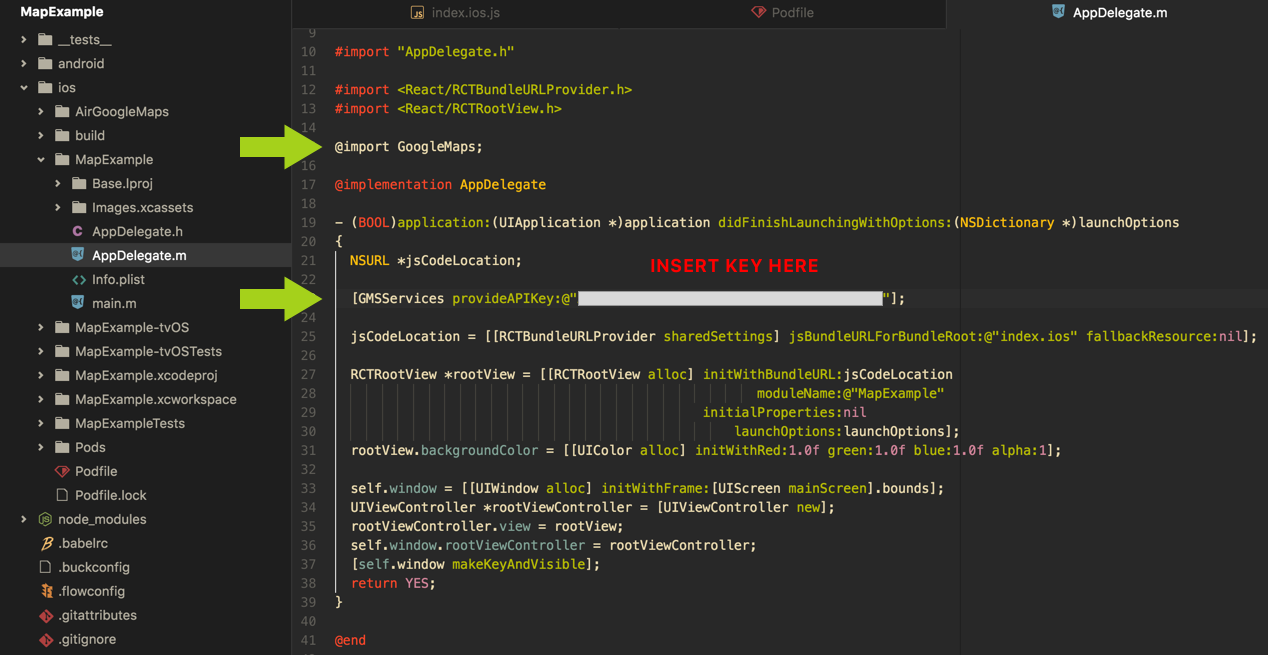
Ok now let’s go back to your code! Don’t worry you’re almost there! With your Google Maps API key you will make a couple changes in your AppDelegate.m file. You’ll insert these two lines of code:
@import GoogleMaps;
[GMSServices provideAPIKey:@"YOUR_GOOGLE_MAP_API_KEY"];

Phew we’re done with linking your project with Xcode! Now is the fun part of actually generating a map! Like I mentioned earlier we’re just putting the map on the home screen, so we’re working in the index.ios.js file.

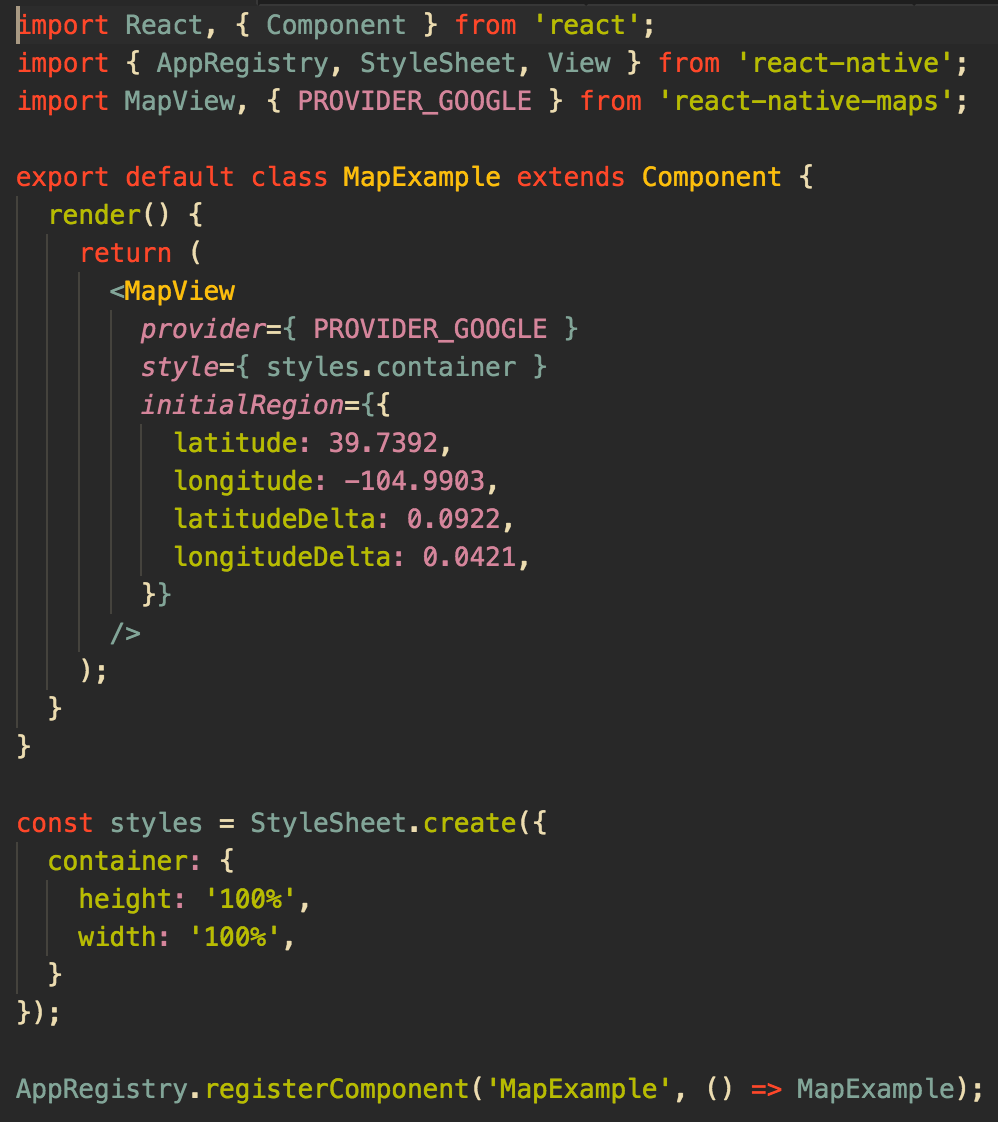
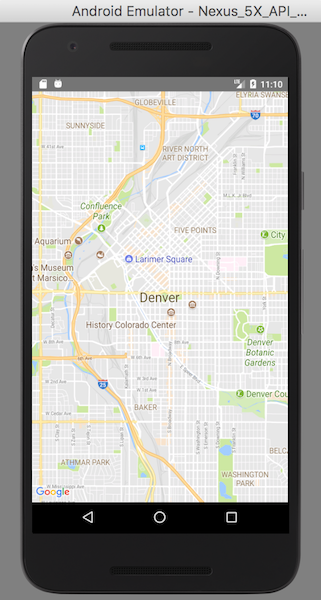
Since I’m from Colorado I just input the latitude and longitude for Denver, but feel free to play around with those coordinates! I’m using the same latitudeDelta and longitudeDelta as the docs, but I’m still trying to figure out the best way to calculate them…but for the time being those numbers work. Also don’t forget to give your map dimensions by adding some styles to it. Ok now it’s the moment of truth, reload your simulator and hopefully there’s a beautiful map! If you’re showing a blank screen with the Google logo in the bottom left corner you might need to enable your Google Maps API key here.
Time for Android development. This has a much easier set-up, especially if you ran react-native link react-native-maps since this command does must of the heavy lifting for you.
In your android/app/build.gradle file make sure you have this dependency:
dependencies {
   compile project(':react-native-maps')
   ...
}
In your android/settings.gradle file make sure you have these lines of code:
include ':react-native-maps'
project(':react-native-maps').projectDir = new File(rootProject.projectDir, '../node_modules/react-native-maps/lib/android')
And finally in your android/app/src/main/AndroidManifest.xml file you will need to insert your API key inside the <application>.
<application>
   <meta-data
      android:name="com.google.android.geo.API_KEY"
      android:value="INSERT GOOGLE MAPS API KEY HERE!!!!!!!"/>
</application>
And that’s it for the set-up…much easier than for iOS development! You can now include a <MapView> in your index.android.js file. Open up your Android Studio and make sure you have an emulator running before you run react-native run-android. But now you should have a map rendering on an Android, hooray!
If you get an error regarding Google play services then you need to make sure you chose an AVD that supports Google APIs.

Now for some real fun we can customize the styling of the map through the Google style generator. Select the style you like and then copy the json object into your code and then you can use those styles by customMapStyle.

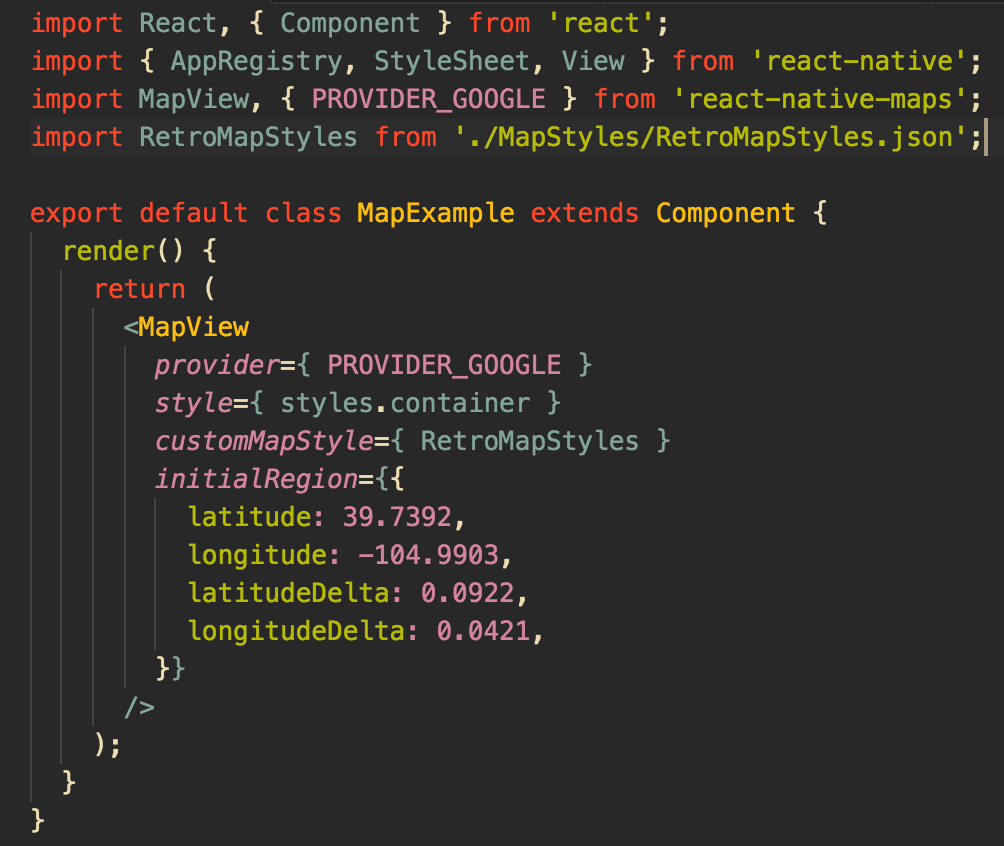
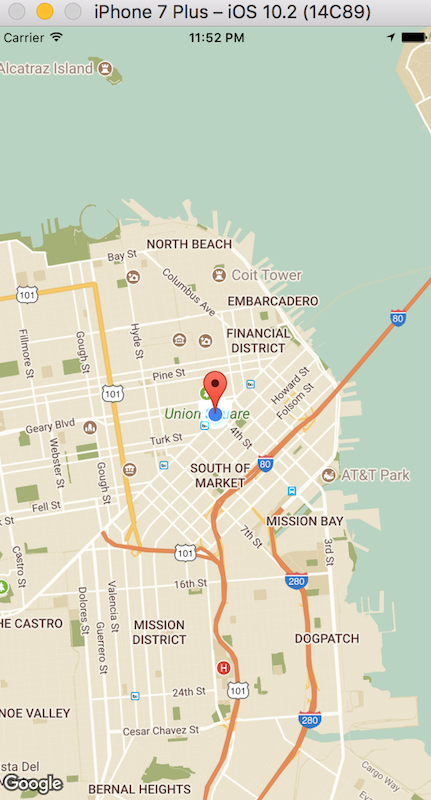
Having fun yet?! Let’s show your current location on the map by using the built in Geolocation when you create a project with react-native init. And don’t worry if it shows that you’re in San Francisco that’s the default current location. If you run the simulator through your personal device it will show your actual current location.

import React, { Component } from 'react';
import { AppRegistry, StyleSheet, View, Dimensions } from 'react-native';
import MapView, { PROVIDER_GOOGLE } from 'react-native-maps';
import RetroMapStyles from './MapStyles/RetroMapStyles.json';let { width, height } = Dimensions.get('window');const ASPECT_RATIO = width / height;
const LATITUDE = 0;
const LONGITUDE = 0;
const LATITUDE_DELTA = 0.0922;
const LONGITUDE_DELTA = LATITUDE_DELTA * ASPECT_RATIO;export default class MapExample extends Component {  constructor() {
    super();    this.state = {
      region: {
        latitude: LATITUDE,
        longitude: LONGITUDE,
        latitudeDelta: LATITUDE_DELTA,
        longitudeDelta: LONGITUDE_DELTA,
      }
    };
  }  componentDidMount() {
    navigator.geolocation.getCurrentPosition(
      position => {
        this.setState({
          region: {
            latitude: position.coords.latitude,
            longitude: position.coords.longitude,
            latitudeDelta: LATITUDE_DELTA,
            longitudeDelta: LONGITUDE_DELTA,
          }
        });
      },
    (error) => console.log(error.message),
    { enableHighAccuracy: true, timeout: 20000, maximumAge: 1000 },
    );
    this.watchID = navigator.geolocation.watchPosition(
      position => {
        this.setState({
          region: {
            latitude: position.coords.latitude,
            longitude: position.coords.longitude,
            latitudeDelta: LATITUDE_DELTA,
            longitudeDelta: LONGITUDE_DELTA,
          }
        });
      }
    );
  }  componentWillUnmount() {
    navigator.geolocation.clearWatch(this.watchID);
  }  render() {
    return (
      <MapView
        provider={ PROVIDER_GOOGLE }
        style={ styles.container }
        customMapStyle={ RetroMapStyles }
        showsUserLocation={ true }
        region={ this.state.region }
        onRegionChange={ region => this.setState({region}) }
        onRegionChangeComplete={ region => this.setState({region}) }
      >
        <MapView.Marker
          coordinate={ this.state.region }
        />
      </MapView>
    );
  }
}const styles = StyleSheet.create({
  container: {
    height: '100%',
    width: '100%',
  }
});AppRegistry.registerComponent('MapExample', () => MapExample);
There’s lots more to maps like animated maps and rendering lots of markers, but I just wanted to get you started! I hope you have as much fun as I did with playing with maps
Some Tags:
react native,react native google maps,react native maps,google maps react native,react native tutorial,react native maps installation,google maps react native ios,react native maps tutorial,how to add a map in react native,google maps react native android,integrate google maps with react native,react,react native maps marker style,react native latitude longitude,react native app,react native maps callout,how to use react native maps,react native maps search bar,react native example
Source Code:


