Were you lost in the internet, searching the best possible way to integrate Ads into your Flutter mobile app? Lucky You! You’ve found the best and easiest explanation to your issue. This article will explain how to integrate Google’s Admob with Flutter.
The current state
Today, the way that this would occur would either be by setting a purchase price for the application, or by adding an In-App Purchase (IAP) to either ‘tip’ the developer, or unlock additional functionality that is worth paying for.
In my opinion, neither option is particularly enjoyable for the end user. After all, how can someone know that the app will work for them, or that it’s high quality without using it first? If it has 5000 five-star app reviews and people are talking about it, then you have a chance. But if you’ve just started out, it’s unlikely that you would have that type of excitement around your app. For people to use it, they have to pay for it to try it out. Sometimes, they can get a refund if they uninstall the app within a certain amount of time, but the thought of paying money for an app that they haven’t used yet could be unpalatable.

Developers at this point normally want to satisfy two key requirements. First, they would probably like to make a little bit of money to offset their costs and time, but at the same time, balance that with the user experience.
Let’s take a look at two ways that apps are monetized today, and some of their downsides.
In-app purchases (IAP) to unlock extra functionality
Sometimes, IAP’s are used to expand upon the existing functionality of a free app. But, from the very start, are you going to have extra functionality that’s worth paying for? Plus, you have to implement the ability in your app to query the store to see what IAP’s have already been purchased. This means you have a dependency on in_app_purchase (from https://pub.dev/packages/in_app_purchase) and you have created purchasable items on both stores. So, you have to write the extra functionality that people will pay to use and then implement the in_app_purchase package in your app. This could add quite a bit of time to your initial development effort. Of course, if it aligns with your original plan for your app and it makes sense, then it could be a good idea for larger apps.
In-app purchases to disable ads
Other times, the developer might charge a nominal fee to disable ads, and to support development. One thing to remember though is that when it comes to apps, user experience is king. If your app looks bad or is hard to use, then your user engagement will suffer. So then it raises the question, are you going to fuss over how your app looks, the precise background color, the animations, and go to all that effort just to slap a bottom bar ad on the screen?
Ads are necessary in today’s world, but let’s be honest with ourselves, they are annoying. You could have the most beautiful app in the world with stunning transitions, but if down the bottom you have a rotating banner ad trying to sell Kingdom Crush XIIV: Crush Harder in a really poor color scheme and font, then what’s the point? You also have to adhere to the advertising requirements set by the advertising provider (like AdMob), and people with ad blocking software on their phones still won’t even see your ads. So there is no monetization in that case.
Recap
So both options, In-App Purchases for extra functionality, or to disable ads, can be a little lacking. Flutter introduces a third option to monetize your app, and I think it’s a pretty fantastic compromise.
The better way: Making a Flutter version of your app for the web
The basic gist of this approach is to build your app for web with as much functionality as you can provide for the web, and then link users to the store so they can purchase a copy if they want extra functionality, or they want to support you as the developer. With Flutter (and with Android Adda Static Pages hosting) this is actually quite trivial.
Your web version will function well and act as an excellent demonstration of how pretty, useful, and responsive your app is.
⚠ Flutter Web components are in Beta, and Google doesn’t recommend them for production use. Then again, in my experience, they are stable and work well. Depending on what you are doing, your mileage can vary.
How does this work?
We’ll make an app in Flutter, and we’ll build for iOS, Android and Web. If people think the app is enjoyable to use, then they can click the link in the app to purchase the app on the iOS or Play Store. We’ll detect the users device through the user agent and direct them to the Play Store or the Apple App Store.
To accomplish this, we’ll need the following:
Packages that support native platforms like iOS and Android, as well as the Web.
Fueltastic has a requirement to store prices in a local database for future retrieval. To satisfy this requirement, we’ll use Hive as our local data store. The first point from that page tells us this:
🚀 Cross platform: mobile, desktop, browser
Just because a package supports web doesn’t necessarily mean you can use the package in the same way on the web as you use it on a phone. Hive is a good example of this. On your device, Hive relies on making a local “box”, opening that box and then writing to it. The local box is a physical file on the users phone.
Obviously, for web, we’re not in a position to create files on the users device. That’s okay though - Hive uses IndexedDB when it is used in a Web setting.
We need to initialize Hive to work in the web setting though, while still maintaining compatibility with the native phone app. With Hive and Flutter, it’s trivially simple to do so. Because it affects how our database is set up on the device, lets take a look at the database service from Fueltastic.
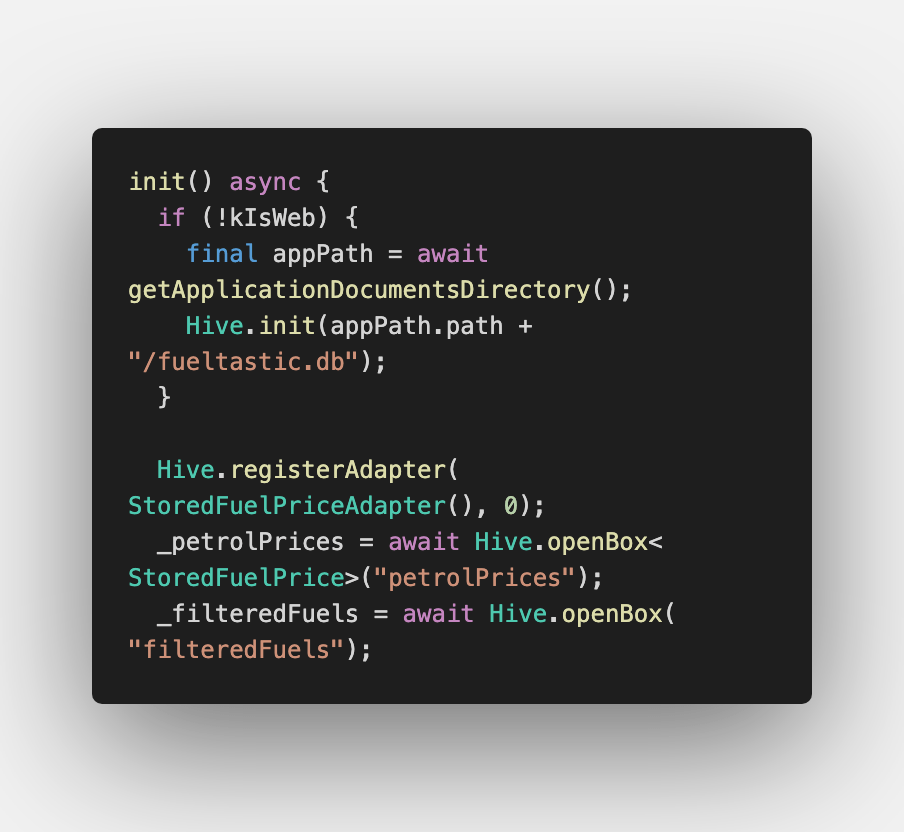
Straight away, the use of kIsWeb is shown. This is a compile-time constant for Flutter. Basically, when we build our app for Web or Native, if we’re not building for Web, then spin up a local file for the database on the users phone. Hive doesn’t require initialization of a file when used on the Web, it just uses IndexedDB. Makes sense, right?
After doing that, we just use Hive the same way as we would on native platforms. Opening/reading boxes work the same way.
If we look at the IndexedDB in Chrome under Developer Tools > Application > IndexedDB we can see these boxes show up.

For your packages, configuring them for web will probably differ. In this case, the configuration difference is quite small. But in cases where the platform implementation is completely different, you can also define an abstract class and then conditionally load the native or web implementation for native or Web when you do your dependency injection.
Setting up the store link
An effective link to the store should satisfy some basic criteria. It should:
- Only appear on devices that are eligible (so, we wouldn’t want the store link appearing on Windows devices, as the app isn’t on the Windows store)
- Create a link to the appropriate store, so, Play Store for Android, Apple Store for iOS Devices
- Reward the user (even if in a small way) for purchasing the app
To work out the users device, we’ll detect the user agent and direct them to the appropriate store. To do this, we’ll use universal_html.
Why are we using
universal_html?In order to detect the user agent, we have to use a
dart:htmlcall to retrieve the user agent. There’s just one catch though, you can’t usedart:htmlin code that is compiled for mobile devices.
universal_htmllets us include the import for web functionality where we need it, while still allowing compilation targeting native devices.
Then, in my app bar, I have this in my actions list.
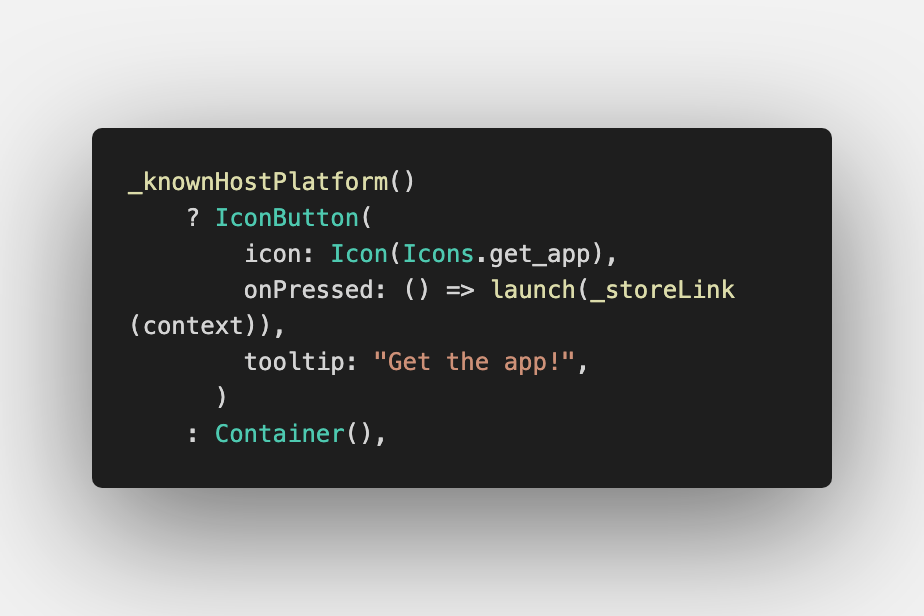
And the supporting functions….
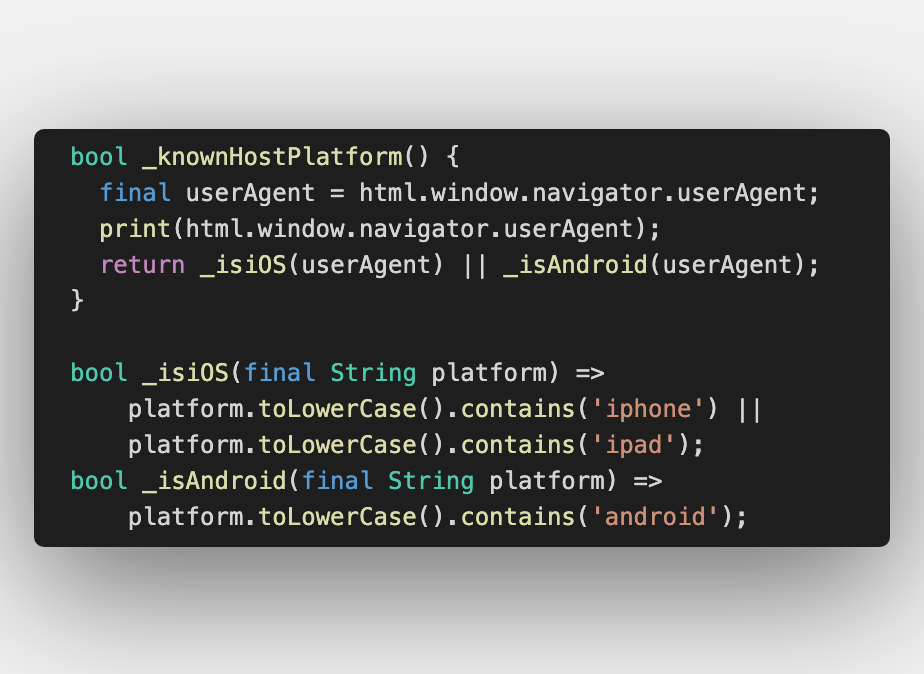
The end result being that people visiting the website on a platform where there is no app will see no download link, whereas people with a known platform will see a download link. Cool, hey?
I use the
launchfunction from theurl_launcherpackage to open the link in a way that is appropriate for the targeted platform.
Let’s see this in practice. Visiting the site on macOS shows this (no download link next to the three dot options menu up the top right).
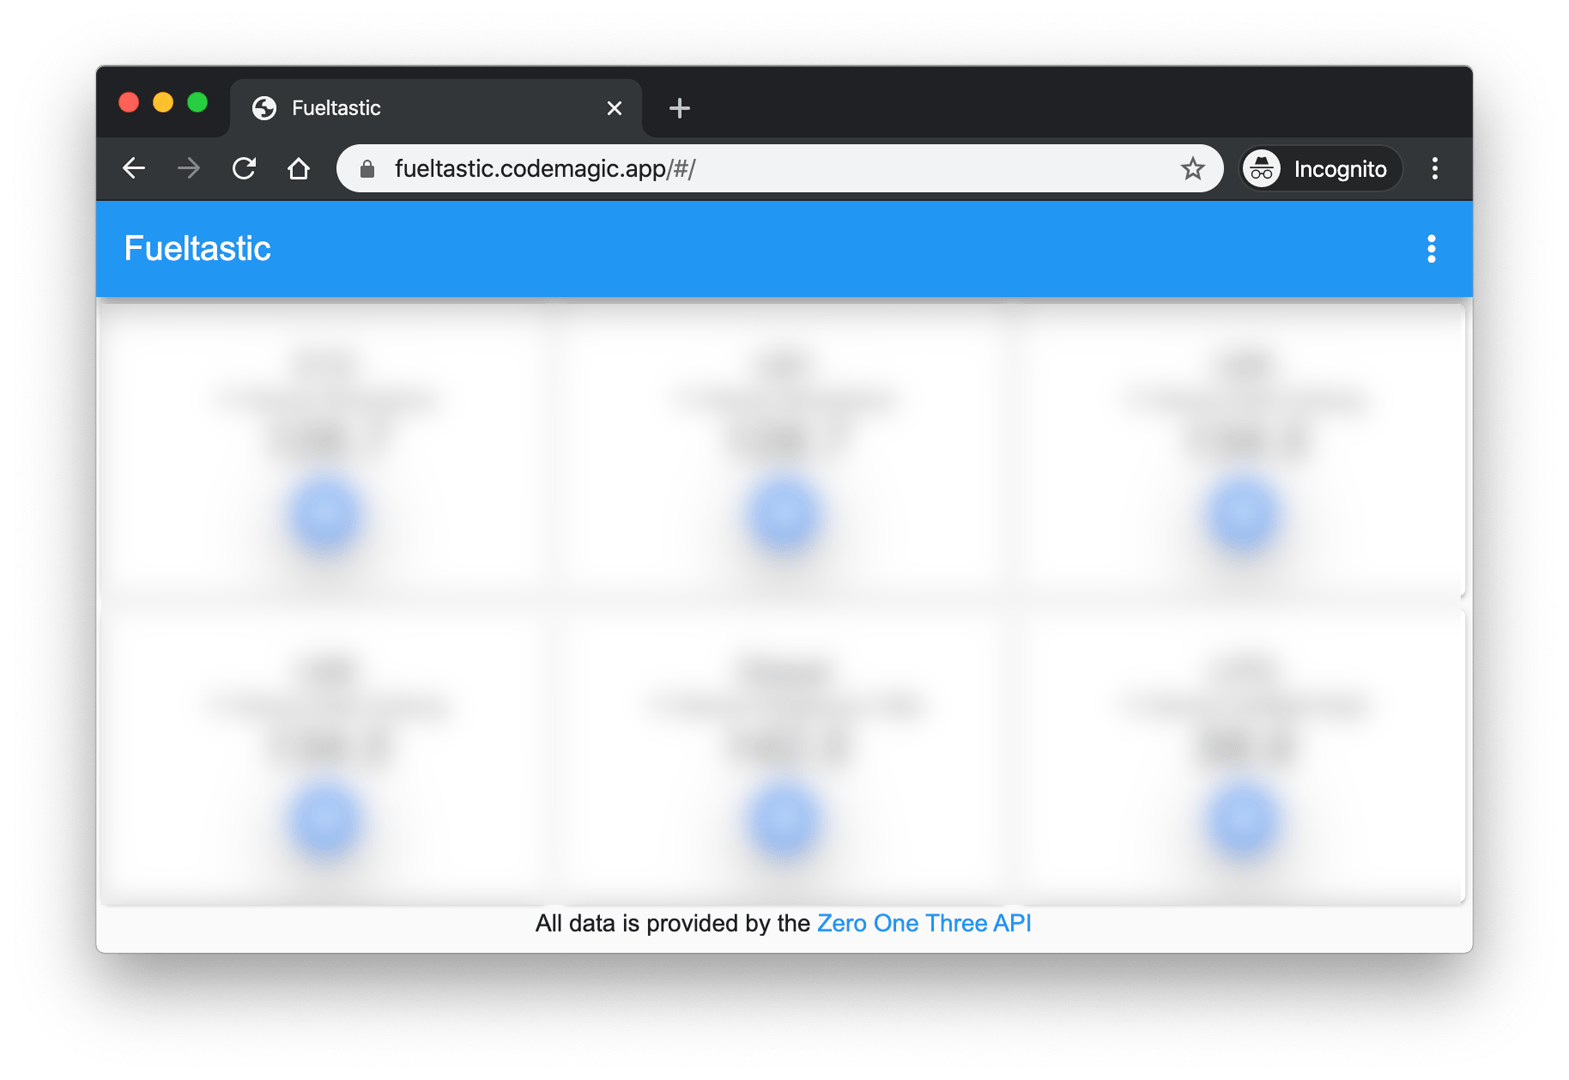
Whereas visiting the site on an Android device with Chrome will show this (notice the top right corner).

Rewarding the user for purchasing your app
For Fueltastic, I added a simple thank-you note on the About screen to thank the user for purchasing my app. Again, we use kIsWeb to detect whether to show this note or not on the about screen.
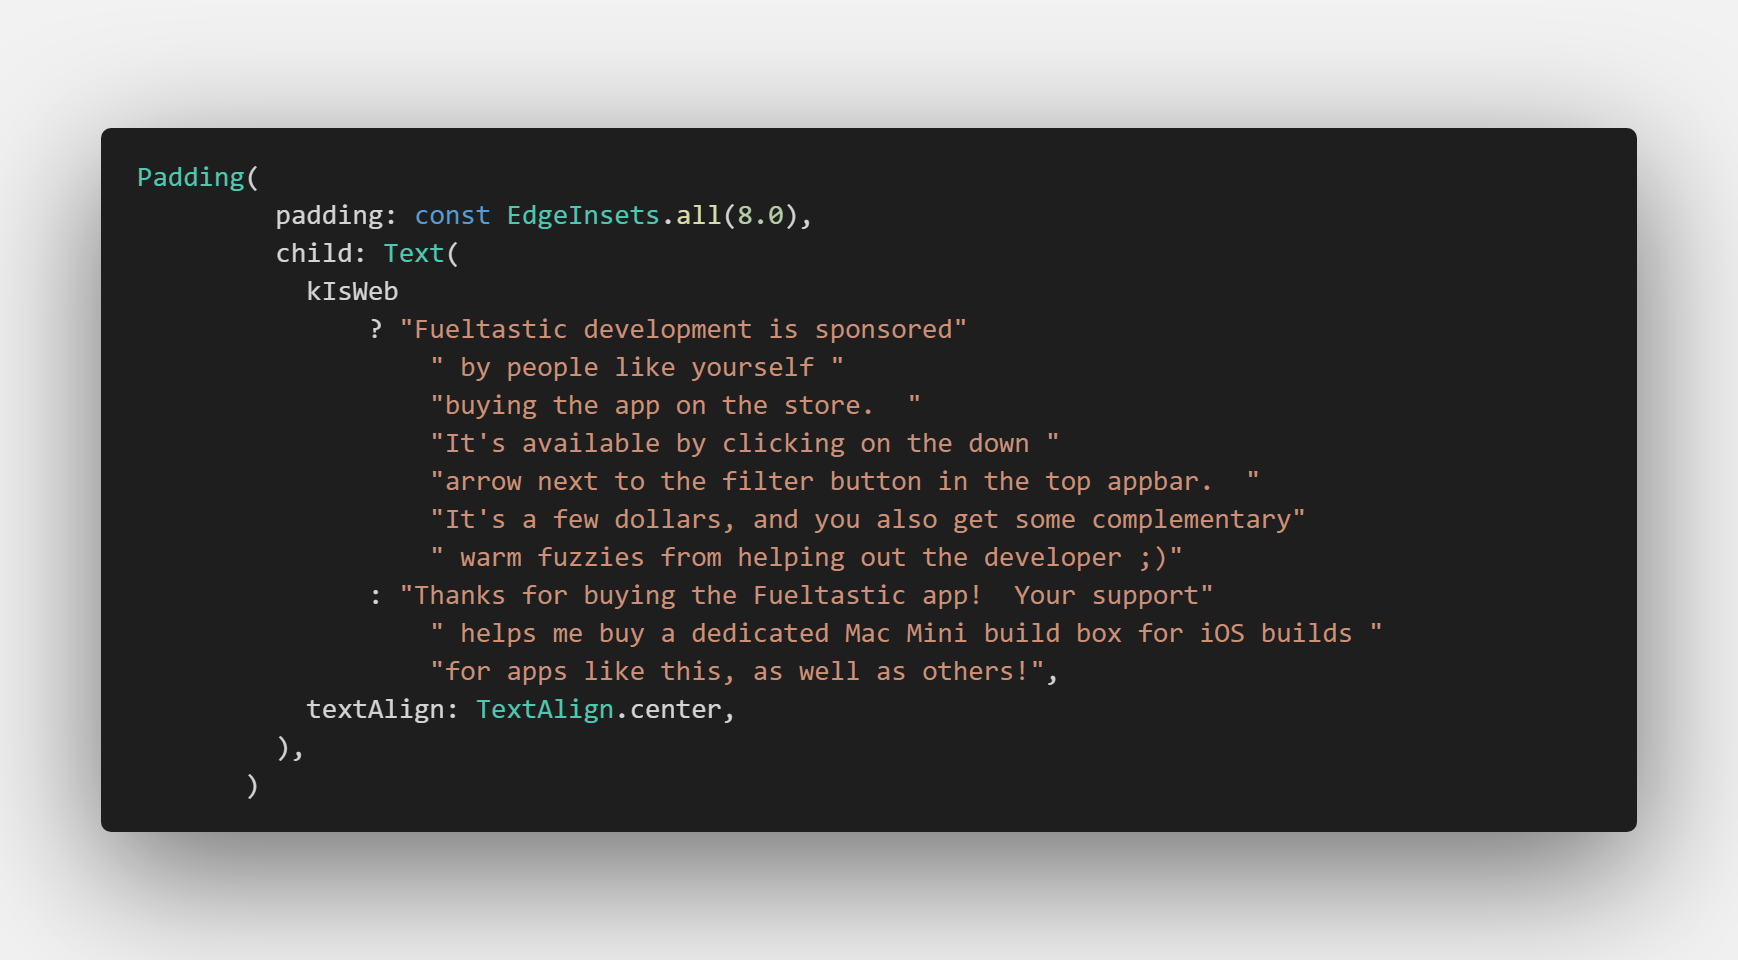
Logically this is correct, as the end user will only see the thank-you note on their device if they have the native app installed, and if they have done that, then they have paid for the app.
Building for Android, iOS, and Web with
Building for Web is as simple as ticking the appropriate box in your build configuration…

…and then hosting it is as simple as filling out the details in the ‘Android Adda Static Pages’ section in your ‘Publish’ section.
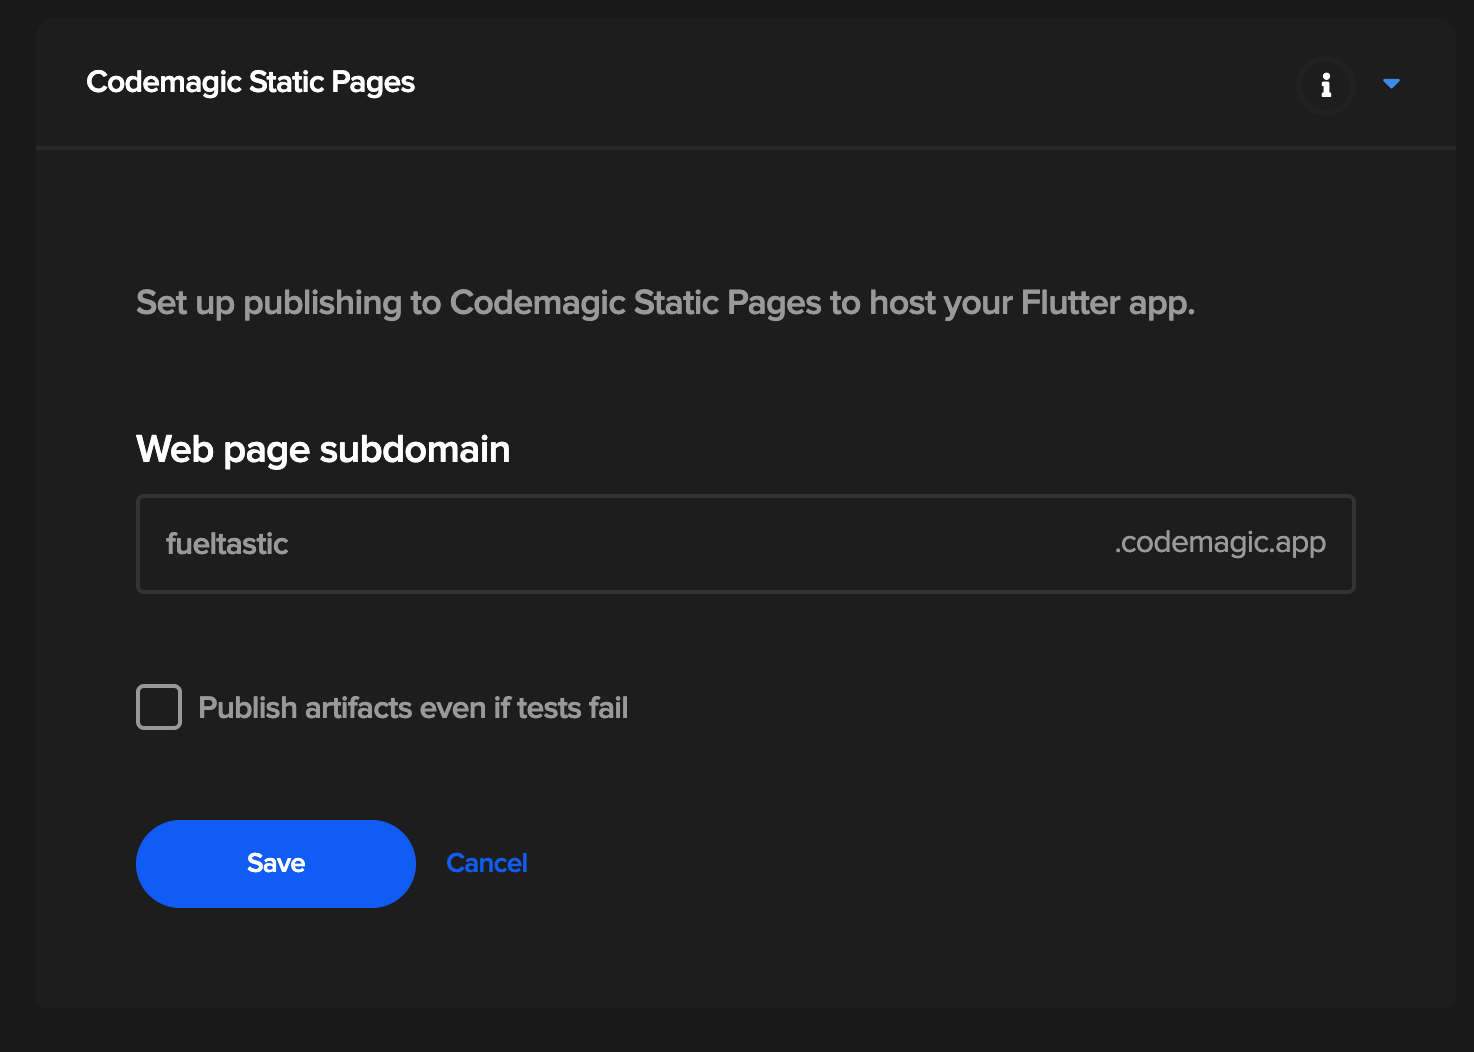
And when your build is complete, you should be able to navigate to your chosen link and use your Flutter app! 🚀🚀🚀
>> Read more about getting started with Codemagic and Flutter for web
Value adding using this approach
The possibilities for this approach are endless. You could add Firebase authentication for people with the app on the phone, and let them have a profile, as well as set up notifications on their phone. This kind of functionality isn’t available with the native web with Flutter today (it is available with a Progressive Web App, but then you’d be writing a whole separate app just to take advantage of this functionality).
Wrapping up
With Flutter, you have an entirely new way to drive user engagement and potentially move users to a paid experience, while still letting them use your app with no ads and no sacrifices. In my opinion, this leads to a better experience for the user which, in turn, builds trust in the quality of your apps. This functionality is something that I’m really excited for and will definitely use in my future apps.
Thanks for reading!


